Tuesday, August 28, 2012

Bakin' With The Cake Ladies: The Fresh Coconut Cake

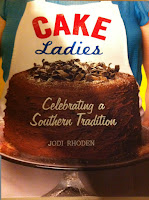
A couple of months ago, I picked up The Cake Ladies by Jodi Rhoden. I have to say this is one of my favorite cake books because all of the recipes look delicious. Being new to the South, I thought I'd bake my way through the book and post pictures and reviews of the cakes as I make them each week.


 Since coconuts seem to allude the masses, I mean aside from granola and shrimp dishes, a lot of people just pass it by in the store labeling it "too much trouble." Jodi Rhoden's book takes this brown bomb and show you how to peel the inner goodness out with ease and turn it into a spectacular treat....The Fresh Coconut Cake.  This cake is delicious without the frosting, which I recommend not making unless you have a double boiler (I had to improvise). The Fresh Coconut Cake is a sweet treat that needs to be eaten within a day, so taking it to a banquet or office party will surely be worth the time spent....and don't be surprised if someone thinks you are a goddess with an oven.

Getting Back On Track...

A lot has happened in the last month or so that I haven't posted, we completed our cross country move where it is safe to say things are a whole lot different around here. I'm sad to report that I did miss the majority of canning season, so I guess better luck next year for me :( I'm sure there are serious canners who would have just put up a bunch of jars and packed them for the move, but being as many of my dishes didnt make it, I wasnt going to chance breaking my jars too. I did, however, get to put up a few jars of fruit cocktail, pineapple, pears, peach butter, spicy carrots, drunken cherries, and chocolate cherry dessert sauce. Needless to say, i've been keeping busy.

The move was long, 4 days of what seemed like endless traveling with dogs, cats, and two birds that all seemed to be getting more miserable as the miles passed behind us. I was excited to pass through Amarillo, TX and visit the AQHA Museum which far surpassed my expectations...as many of my closest friends are aware I am not a fan of the Quarter Horse. I know, to many I have just committed the ultimate sin...my mom had Quarter Horses and they just arent for me. Im a Draft Horse girl, my horses were always ready to work or do whatever I asked of them and the Quarter Horses **Our Quarter Horses** were lazy and freaked out when ever introducing something new. I guess they are creatures of habit....whatever. Getting back to the museum, it honestly gave me an appreciation I never had for Quarter Horses as I walked the hallways filled with amazing animals and true assets to the breed.

Now that I am here, getting used to the people who view me as a clear outsider, one thing I am really excited about is the amount of farmer's markets, or "fresh markets" as they are called here. There are a lot of people offering Organic goods, but I still cant wait until my garden is planted and producing because my canning habit is getting expensive. I am also anxiously awaiting the arrival of the goats and chickens I will be adding next spring.

On a more amusing note, I finally discovered grits. Being born and raised in Southern California, I have heard of grits but I have never tried them, my first visit to the local Waffle House with a friend cured that. They were shocked that I have never tried them before, but when I explained where I was from they quickly grabbed me a sample bowl and I was able to try them with sugar and plain. Apparently, "I'm from California" can be a good excuse for everything.....including my (on occasion) bad behavior :)


I hope no one else missed the prime canning season on account of a long move.

Wednesday, July 11, 2012

Repurposing: Indoor Herb Garden

As a Mason Jar fanatic, I never thought of using my jars for anything other than displaying food. However, this is an idea I think I am going to try. With new jars of course....lol I cant bring myself to use my old ones.

What you will need:
Mason/Kerr/Ball Jars
A Board (can be stained or distressed, your choice)
Nails or Screws
Hose Clamps (Large enough to fit your jars)
Potting Soil
Pea Gravel
Herbs

Directions:
1. Place a little bit of the pea gravel at the bottom of each jar. Fill the jar with potting soil and plant the herb.
2. Attach the clamp to the board with a nail or screw.
3. Hang the board in the desired area.
4. Place the jar inside the clamp and close so the jar is now attached to the board.
5. Enjoy your new herb garden!

Repurposing: Corks

I saw this posted to my FaceBook page and I had to repost it here.

What you need:
Corks
Twine
Discarded Forks
A Marker

Directions:
Write the name of the herb/veggie on the cork. Wrap the forks in twine, stick the corks onto the fork, and plant. Now you will never confuse your herbs or veggies again.

Saturday, June 30, 2012

Good To Know...

In an emergency situation it is always good to know what your blood type is and who you can give and receive blood from.

Friday, June 29, 2012

Mason Jar Collections

Just when you think you have a pretty awesome collection going, you run into something like this. Here is a man with a pretty serious Mason/Ball jar collection http://www2.wcoil.com/~aux/MB/MB.html. Although I have been seriously humbled, I have added the site so others can see the various styles and types of jars put out over the years. Apparently, they give tours, so if youre in the neighborhood and want to check out the jars and learn a lot you should check it out. Have fun!

Thursday, June 28, 2012

Butter In A Mason Jar

What You Will Need:
2 Pints Heavy Whipping Cream
A Jar (I used 2 Quart Jars)
A Marble (I Made 2 Batches, So 2 Marbles)


Pour cream into the jar, drop in the marble, close the lid, and start shaking.


Keep checking the mixture every 3 to 4 minutes, the consistency will change from whipped cream, to little clumps of butter.

The texture will change from this...

to this.


Continue shaking for a few minutes then drain the liquid from the jar. **This is the buttermilk, you can keep it for future use or discard**

Drain Buttermilk
We have achieved butter!
Rinse until water runs clear
The butter is now ready for use; however, if you are going to store it, it should be washed. Add ½ C ice water to the jar and shake for another 3 minutes. Drain the water and repeat the process until the water is clear. Mash the butter to strain the remaining water from the butter.

If you would like to add more flavor to your butter, you can mix in salt or fresh herbs.

Scoop the butter into a mold, container, or wax paper to store in the refrigerator.

Butter can also be made in the blender if you aren’t up for the shaking. I’m thinking this is perfect for the Huckleberry to do during football season. ;)
Butter during the rinsing stage
Texture

**Note: I started with all of the ingredients in 1 jar, but it was taking to long (im impatient), so I split it up into 2 quart jars and the process went way faster.
Done!